
How to install car parking sensor kit?
Install the sensors in the front and/or rear bumpers;
Choose the appropriate angle rings for that particular vehicle;
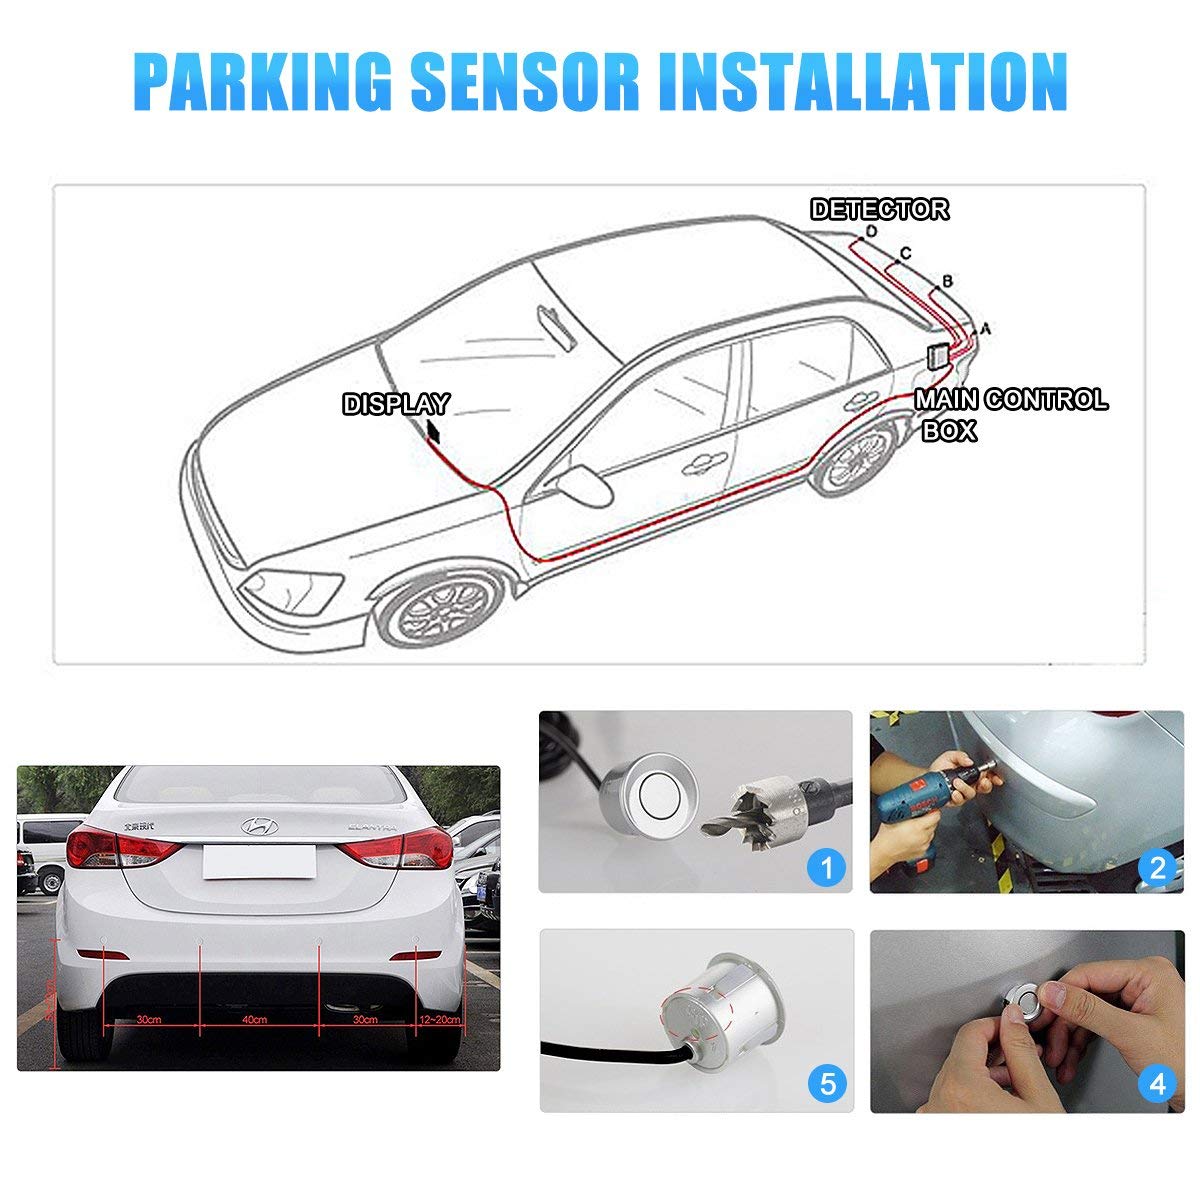
Installing Minpn’s parking sensor is actually very simple. It can be done in 5 simple steps:
Install the sensors in the front and/or rear bumpers
Choose the appropriate angle rings for that particular vehicle
Install the angle rings
Install the speaker and LCD screen
Connect to the power supply
For more information including detailed images, see our manual.
Installation Notice
Do not clamp down the sensor’s core when installing The front sensor is installed by sequence E,F,G,H The back sensor is installed by sequence A,B,C,D
Cable connector is inserted by E,F,G,H,A,B,C,D
The sensor and control box have been strictly matched in production, do not mix-using the sensors when installing
Do not have anything higher than the sensor
When installing the front sensor, please do not close up the engine or face to the cooling fan
Other notice please see the picture 3
Sensor Installation
Front Sensor is installed on the shell beside of the headlight, rear sensor is installed on the back bumper. Choosing a place where is vertical with the ground or a bit up tilting to the ground, please see Picture 4. It should be installed 5-10 degree up tilting to the ground if the installation position is lower than 50 cm to the ground.
Notice: Please install the sensors with the arrowhead upward if there is arrow mark on the back end, or it will detect the ground as the obstacle by mistake.
 0086-0595-22418756